REVIEW · JAIPUR
Hands-on Embroidery Workshop
Book on Viator →Operated by Creatis · Bookable on Viator
Hands-on crafts in Jaipur can be surprisingly calming. This 2-hour Embroidery Fundamentals & Embellishment Techniques Workshop is built for beginners, but it doesn’t feel “baby steps” either. You’ll learn how a small set of stitches and smart finishing choices can turn plain fabric into something you’ll want to keep (or wear).
Two things I really like about this class: it’s guided and practical with clear stitch categories (outlines, fills, details, joining), and it includes decorative embellishment technique with beads, mirrors, sequins, and coils—plus tips to attach them so they don’t fall off the first time you move it.
One consideration: you’re working in a short 2-hour session, so if you want a super complex design, plan to keep your expectations focused on learning and a well-finished starter piece rather than a giant masterpiece.
In This Review
- Key takeaways before you go
- Embroidery 101, without the intimidation
- Picking your project: hoop sampler or sew-on patch
- Hooped sampler (display option)
- Sew-on patch (wear or accessory option)
- Tools and materials: get set up fast
- The stitch menu: outlines, fills, accents, and joining
- Borders and outlines
- Fill and texture
- Details and accents
- Structural and joining stitches
- Adding shine the right way: beads, mirrors, sequins, coils
- 3D and decorative effects that lift off the fabric
- Timing and flow: what you’ll do in two hours
- Where to go in Jaipur (and how to show up)
- Price and value: $25.50 that actually buys skill
- Who should book this embroidery workshop
- Should you book it
- FAQ
- How long is the embroidery workshop?
- How much does it cost?
- Is hotel pickup included?
- What is included in the price?
- Where does the workshop start?
- What is the minimum age?
- What should I wear?
Key takeaways before you go
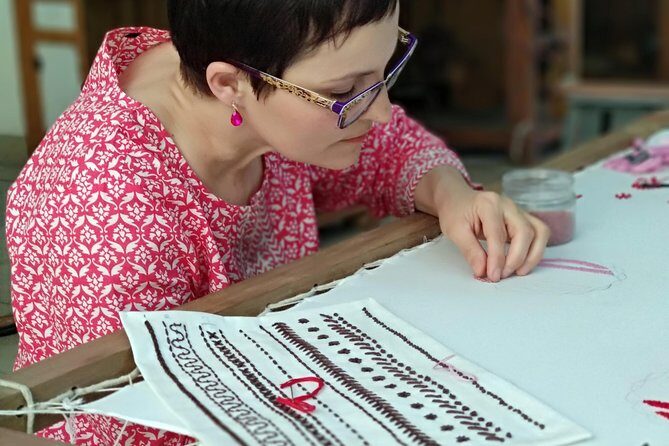
- Beginner-friendly stitch training that covers borders, outlines, fill/texture, and structural joining
- Embellishments with attachment know-how for beads, mirrors, sequins, and coils
- Choose your end product: a hooped sampler for display or a sew-on patch for clothes/accessories
- Small group feel with a maximum of 15 travelers
- You’ll likely leave with more than you started since the shop provides materials and may include take-home extras like an embroidery hoop
Embroidery 101, without the intimidation
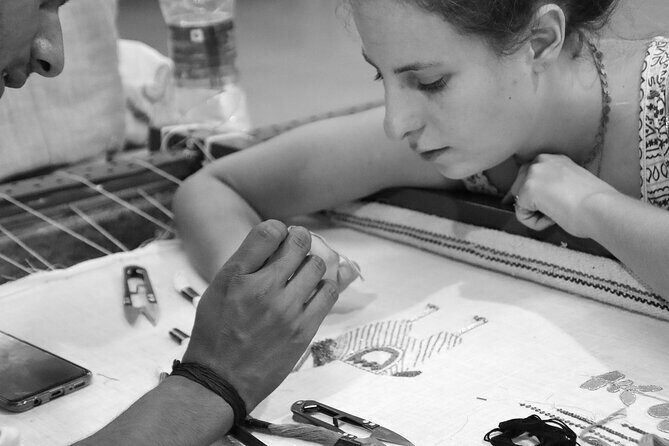
Jaipur is a great place to learn a textile craft because everything is visual there. You’ll see embroidery everywhere, from clothing details to craft markets, so it helps to have someone show you what’s actually going on behind the look.
This workshop is designed around a simple idea: if you can master a handful of stitches and a few finishing tricks, you can build endless variations. That’s why the session doesn’t just teach you to copy a pattern. It teaches you what each stitch is for—framing, filling, adding tiny accents, and creating strength where pieces meet.
If you’ve never stitched before, that’s fine. The format is meant to get you working quickly with tools and materials, then gradually lead you through technique.
You can also read our reviews of more tours and experiences in Jaipur

Picking your project: hoop sampler or sew-on patch
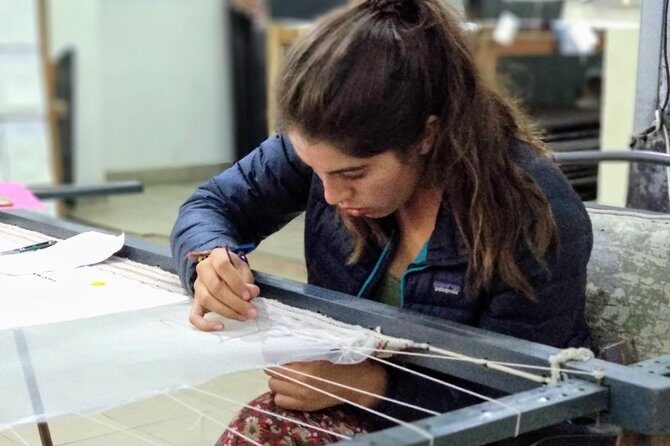
You don’t just sit there watching a demo. You choose how you want to end your session, and that decision changes how you think about the work.
Hooped sampler (display option)
A hooped sampler is a classic choice because it’s meant to look good even if you keep the design relatively simple. It’s also a nice way to practice consistency—your outlines and borders matter, and you can show off different stitch styles in one finished piece.
Sew-on patch (wear or accessory option)
A sew-on patch is practical if you want your embroidery to become something you use. The key here is the “structural & joining” side of the workshop—learning stitches that hold and secure rather than just decorate.
Either way, you’ll start from a plain fabric base and turn it into something finished. That transformation is the whole point, and it’s more satisfying than it sounds.
Tools and materials: get set up fast
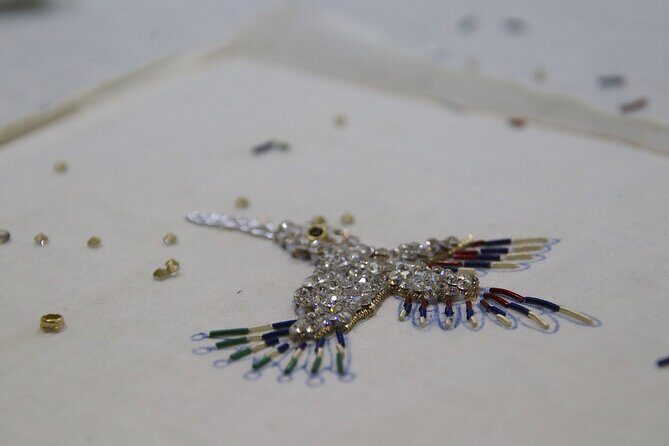
Before you stitch, you’ll get familiar with the basics: tools, materials, and how to prep your fabric. You’ll also learn how designs get transferred, so you’re not guessing where every line goes.
This part matters more than you might think. A lot of beginner frustration comes from skipped basics—fabric that isn’t positioned right, a design that isn’t marked cleanly, or a setup that makes your stitches twist. When you get those steps correct, the stitching itself feels easier and more controlled.
The workshop runs with a relaxed, guided approach and a team that keeps you comfortable while you work. Mohit is named as the manager in the workshop’s own feedback, and the tone you’ll find there is supportive rather than stiff.






The stitch menu: outlines, fills, accents, and joining
This class is organized around a clear stitch set. You’re not stuck with just one style. You’ll practice stitches for different jobs, which is exactly how embroidery stays fun instead of turning into repetitive copying.
Borders and outlines
You’ll learn how to frame your work with cleaner edges and defined shapes—stems, flowing lines, and boundary work. This is where you can make a piece look “designed” even if it’s not complicated.
If you’re nervous about starting, begin here. Outlines give you structure, and once you see the line you’re following, the rest feels less random.
Fill and texture
Next comes pattern and coverage—playing with how stitches build surface texture. This is where embroidery becomes tactile. You can literally feel your fabric changing as stitches build up.
Texture skills are also useful later if you want to upgrade a future piece. Once you understand how fill behaves, you’ll know what to change when something looks flat or uneven.
Details and accents
Then you add the small touches that make it feel complete. These are the micro-decisions: small shapes, crisp points, and tiny accent work that catches the eye.
This is also where embellishments come in, so you’ll be switching mental gears from “stitching lines” to “placing sparkle.”
Structural and joining stitches
You’ll learn the stitches that hold things together with subtle strength. For a sew-on patch, this matters a lot. For a hooped sampler, it still matters because finishing keeps edges from pulling or distorting.
Think of it like sewing fundamentals for embroidery. You want your piece to look good today and still look solid later.
Adding shine the right way: beads, mirrors, sequins, coils
The decorative portion is one of the most memorable parts because it’s visual and hands-on. You’ll learn how to enhance your embroidery using beads, mirrors, sequins, and coils.
But the practical value is the attachment technique. A lot of sparkle crafts fail because embellishments are added without considering tension, placement, and durability. In this workshop, you get tips for secure, long-lasting attachment.
That means you’re not just decorating. You’re learning craft logic: where to anchor, how to manage thread tension, and how to keep things stable on fabric.
If you want your embroidery to be wearable, this section is the difference between pretty and actually dependable.
3D and decorative effects that lift off the fabric
One part of the session focuses on raised, sculptural effects—embroidery that lifts off the fabric instead of staying flat. This is where your piece starts to look more like design than decoration.
Even if your final piece is small, 3D techniques make it more dimensional. You’ll likely find that these raised elements are also where beginners learn the most, because you have to slow down and think about how stitches shape volume.
In a 2-hour workshop, you won’t have time to experiment endlessly, but the class gives you a starting toolkit. You can use it later to push your own designs in a second session or a personal project.
Timing and flow: what you’ll do in two hours
This is an approximately 2-hour session, and it’s structured to move you from setup to finished technique practice.
A realistic way to picture the flow:
- You get set up with tools and materials, including fabric prep and design transfer
- You choose your project style (hooped sampler or sew-on patch)
- You practice stitch categories in a guided way: outlines, fills, details, and joining
- You add decorative elements like beads, mirrors, sequins, and coils
- You finish your piece and leave with what you made plus class materials
Because time is limited, the “success metric” here is learning and completing a meaningful starter artwork. You’ll walk away with something tangible, not just notes in your head.
Where to go in Jaipur (and how to show up)
Meeting point details are clear, which helps if you’re navigating Jaipur by rickshaw or on foot.
Start at: Creatis A12 Sudarshanpura RIICO, behind Tata Motors Service Center, Industrial Area, Sudarshanpura, Bais Godam, Jaipur, Rajasthan 302006, India.
The activity ends back at the meeting point.
You’ll want to arrive ready to work: smart casual is the dress code, and it’s near public transportation, so you’re not stuck hiring private transport just for this.
Practical tip: wear something you don’t mind with a tiny risk of thread or craft bits. Not because they’ll make a mess, but because embroidery is hands-on and fabric-based.
Price and value: $25.50 that actually buys skill
At $25.50 per person, this workshop is priced as an entry-level craft lesson. The value gets better because the price includes all taxes, fees, and handling charges, and it includes GST.
What you’re really paying for isn’t just the instructor time. It’s the guided structure:
- stitch types you can reuse later
- embellishment attachment technique
- a choice of finished format (hoop sampler vs sew-on patch)
- a small group environment (maximum 15)
You’ll also get the materials needed for the session. And based on feedback from the workshop experience, take-home extras can happen—one person specifically highlighted receiving an embroidery hoop and other goodies to keep practicing after the class.
Even if you just want a fun, creative block of time in Jaipur, this gives you a skill transfer, not only a souvenir.
Who should book this embroidery workshop
This is a great fit if:
- You’re a complete beginner and want clear steps, not guesswork
- You want to try embroidery without committing to a long course
- You like crafts where the results are immediate and visual
- You want your work to become wearable (patch option) or displayable (hoop sampler)
If you’re an advanced embroiderer, you might still enjoy it as a structured refresher on basics and finishing methods, especially the decorative attachment tips.
Should you book it
I’d recommend booking this workshop if you want a hands-on Jaipur activity that teaches real technique in a short window. The combination of stitch fundamentals plus decorative skills is the sweet spot, and the small-group setup keeps it from feeling rushed or anonymous.
I’d reconsider only if you’re expecting a huge, highly detailed custom design in two hours. This is a learning-focused session. You’ll leave with a finished piece and a working method you can repeat, which is honestly the best kind of souvenir.
FAQ
How long is the embroidery workshop?
The workshop runs for about 2 hours.
How much does it cost?
It costs $25.50 per person.
Is hotel pickup included?
No, hotel pickup is not included.
What is included in the price?
The price includes all taxes, fees, and handling charges, including GST.
Where does the workshop start?
You’ll meet at Creatis A12 Sudarshanpura RIICO, behind Tata Motors Service Center, in Sudarshanpura, Bais Godam, Jaipur. The activity ends back at the meeting point.
What is the minimum age?
The minimum age is 18 years.
What should I wear?
The dress code is smart casual.
If you want, tell me your comfort level (total beginner or some stitching already) and whether you prefer making something wearable or displayable. I’ll suggest the best project style for you.